How to Use Keyframes in Alight Motion Beginner to Pro Guide
Learn everything there is to know about using keyframes in Alight Motion to understand how to create smooth animations, zoom effects, and transitions.
Alight Motion is one of the most popular mobile video editors in the content creator community. Whether you are creating Instagram reels, TikTok videos, or Youtube edits, you are able to create powerful edits right from your mobile device. However, one of the standout features of this editing app is the keyframe feature.
If you have ever seen an animation or a video editor has moved the text smoothly, or has used cinematic linear transitions between clips, then the answer is most likely keyframes. The keyrestriction feature is the primary reason there are a lot of transitions and animations that look smooth in Youtube edits. Many beginners find this feature of keyframes to be confusing, but once you understand this feature, this is as easy of a feature as adding a text field.
What Are Keyframes in Alight Motion?
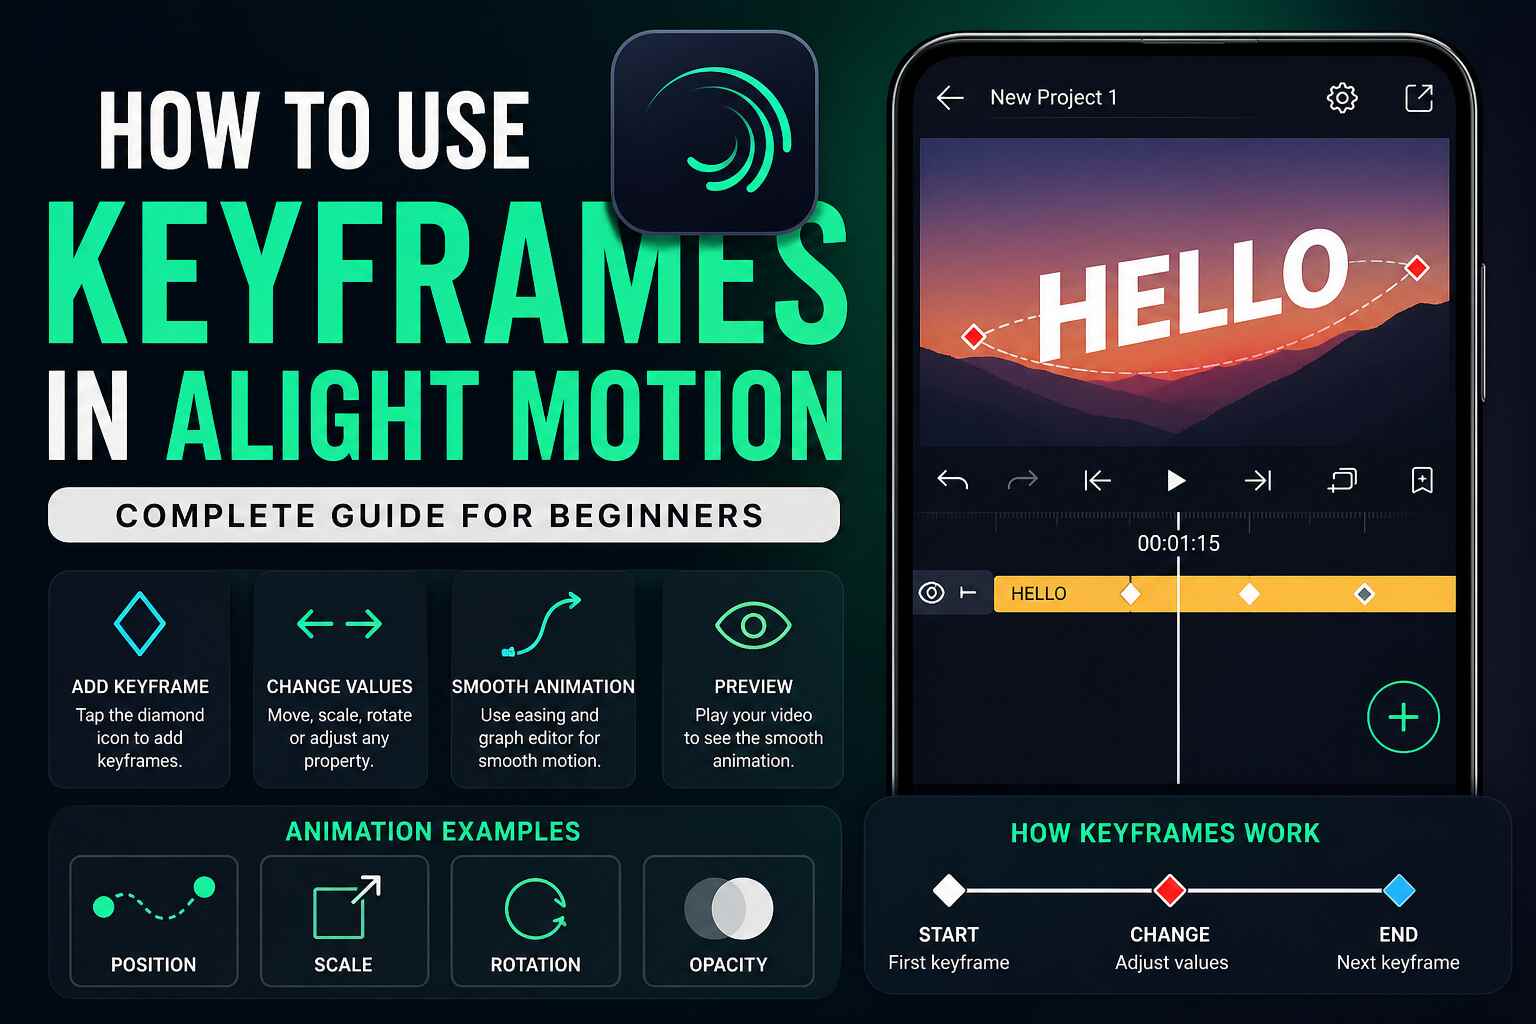
A keyframe is a point on your video timeline in time that marks the specifics of how an object appears or behaves at any particular moment. For instance, you might want your text animation to begin at the left side of the screen and end on the right. You will:
- Place a key frame at the starting position
- Add a keyframe here at the end position
- Alight Motion animates the smooth transitions between these points.
To put it simply, keyframes are the sleepy ones who wake up and do animation or motion. They instruct the app to do a certain task at a specified time Without keyframes, your text, images or videos won’t move. They can move, zoom, rotate and fade with keyframes.
Why Keyframes Are Important in Video Editing
Keyframes form the basis of almost all animations in Alight Motion. In this guide, we will show you how to use equipment that you need to create engaging and professional videos.
Here are some key benefits:
- They enable seamless motion and transitions
- You can easily do some Text and graphics Animation
- They assist in zoom and camera flow
- You can manage animations by timing and speed
- This gives your videos a more dynamic look and less static feel
Keyframe-based animations are still the backbone of most viral edits on social media. Therefore, learning this feature can really enhance your editing skills.
Where to Find Keyframes in Alight Motion
Before learning keyframes, it is crucial to know where to find them in the app.
Here is how this is done.
- Open Alight Motion
- Create a new project
- Add a layer (text, image, or video)
- Tap on layer to unlock the editing options
- Locate the diamond-shaped icon (◇)
The diamond-shaped icon defines where the keyframes are. You will utilize this to add animations.
How to Use Keyframes in Alight Motion (Step-by-Step)
Let’s create a simple animation to understand how keyframes work.
Step 1: Add Your Layer
The first step to adding layers is to add video, text, or an image to your timeline.
Step 2: Set the First Keyframe
Move the timeline to the beginning and tap the diamond icon. This will create your first keyframe.
Step 3: Move Forward in Timeline
Drag the timeline a few seconds ahead.
Step 4: Change the Position or Property
Now move your object on the screen, or change its size, rotation, or opacity.
A second keyframe will be created automatically.
Step 5: Preview Your Animation
Press play, and you will see smooth movement between the two keyframes.
This is the basic idea behind all animations in Alight Motion.
Types of Animations You Can Create
Once you understand keyframes, you can create different types of animations:
Position Animation
You can move objects from one place to another.
Example: Text sliding into the screen.
Scale Animation (Zoom Effect)
You can make objects bigger or smaller.
Example: Zoom in on a subject.
Rotation Animation
You can rotate objects easily.
Example: Spinning logos or icons.
Opacity Animation
You can control how visible an object is.
Example: Fade in or fade out effects.
By combining these animations, you can create complex and attractive edits.
How to Make Smooth Animations Using Easing
If you ever watch cartoons, certain animations look stiff or robotic. This takes place when no easing is stated.
What is Easing?
Easing controls the speed of your animation.
- Ease In: Animation starts slowly
- Ease Out: Animation ends slowly
- Ease In-Out: Smooth start and end
How to Use Easing in Alight Motion
- Tap on a keyframe
- Open the Graph Editor
- Adjust the curve to control speed
Using easing makes your animations look more natural and professional. It is a very important step if you want high-quality edits.
Pro Tips to Improve Your Keyframe Skills
If you want to get better results, keep these tips in mind:
- Begin with Easy Animations, Build to Complex Ones
- For Smooth Motion, Always Use Easing
- Limit Keyframes
- Keep your Timing Constant
- Use timeline zoom to maintain control
- Keyframing is a skill you can master with practice
Practice is the key to mastering keyframes.
Common Mistakes Beginners Should Avoid
Many beginners make similar mistakes when using keyframes:
- Adding too many keyframes, making animation messy
- Not using easing, resulting in robotic motion
- Moving objects too fast
- Poor spacing between keyframes
Avoiding these mistakes will help you create cleaner and more professional edits.
Simple Practice Project
To improve your skills, try this easy project:
- Add text “Hello”
- Set first keyframe: small and invisible
- Set second keyframe: bigger and visible
- Apply easing using graph editor
This will create a smooth intro animation and help you understand keyframes better.
Conclusion
Alight Motion’s keyframes work right because Animation is the heart of Alight motion Animate Smoothly. Mobile, Professional Look, and engaging effects. All of these are work from your device right away. Practicing Keyframing regularly will actually make your edits shine, effectively working a Viral Video. You will see value changes with your technique and edits simply improve.